

Bye-Bye Contractors: I’m Taking Charge, DIY Style.
How many hours have you wasted researching companies, calling around, and waiting forever for callbacks—only to end up with nothing but frustration? And what’s up with contractors throwing out verbal quotes but refusing to put anything in writing? When did business go back to being a handshake and a promise? I need solid numbers, dates, and a guarantee that someone’s actually going to show up and get the job done!
After way too much waiting, I decided enough was enough. Instead of relying on others, I dove into DIY—one project at a time—and now I share my journeys with you. I’m not a certified pro, just someone who got fed up with hunting for reliable help and decided to take matters into my own hands.
In this blog post, I will share with you my journey of installing vinyl plank flooring in my She Shed! Yes, I tackled this project all by myself. After diving into countless articles and “How To” videos, I found some were way too long and others just didn’t hit the mark. This post isn’t a step-by-step guide, but more of a “Heads up before you start to avoid some headaches.” So, if you’re hunting for a detailed how-to, you might want to keep searching (because I know your time is precious). But if you’re up for a break, grab a seat and check out my journey. Hopefully, you’ll pick up a nugget or two from my experience. Ready? Let’s get to it!
Dreaming Up the Perfect She Shed Floor!

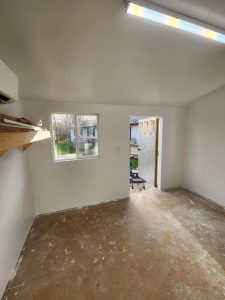
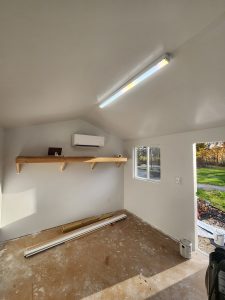
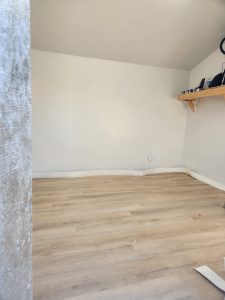
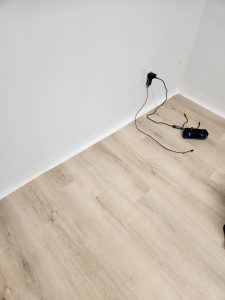
(Floor after drywall and painting, prior to vinyl plank install.)
Sure, I could’ve kept the flooring that came with my Tuff Shed, but where’s the DIY fun in that? I wanted a more polished look, so vinyl plank flooring it was!
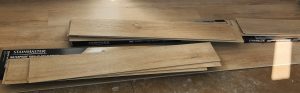
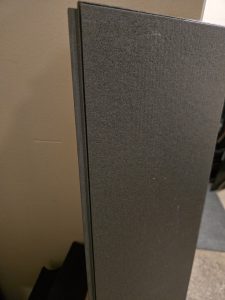
(Vinyl Plank Flooring – Stainmaster Austin Oak Brown Wood Look)
If you’re thinking about sprucing up your shed’s floors, it’s worth doing a bit of homework to figure out what suits your needs and climate best. One big factor? Moisture resistance—it’s a game-changer and depends a lot on the type of foundation you’re working with. (I talk more about this in a video on my YouTube Channel: Save Yourself From Start To Finish). My shed sits on a gravel foundation, which helps to keep moisture out.
Think about how you want to use your shed—is it going to be your cozy little retreat that’s easy to clean, or a rugged workshop that can handle heavy furniture and equipment? For me, light traffic flooring was perfect since it’s just me relaxing in my space, so I opted for vinyl plank flooring by Stainmaster in Austin Oak Brown wood look finish. Oh, and here’s a must-do tip: always grab extra flooring! 10% is the recommended overage. You’ll thank yourself later if you ever need to replace a board.
If you’re not a pro, go for flooring that’s easy to work with and make sure you’ve got the right tools on hand. The flooring I picked came with an underlay backing, which saved me some extra steps. If yours doesn’t, you’ll need to figure out whether an underlayment is necessary—it really makes a difference in durability, comfort, and moisture protection, especially over subfloors like concrete.
And don’t let those DIY videos fool you! Installing the floor wasn’t exactly a walk in the park. They make it look so smooth and easy, but trust and believe, it’s tougher than it seems. If you’re up for the challenge, just be prepared and take it one step at a time! One last thing before you dive in, the bigger your shed, the bigger the time commitment, so don’t go into this thinking it’s just a quick weekend project. Take my She Shed, for example—it’s 12 x 10, and I figured the floor was perfectly square. Spoiler alert: it wasn’t! That meant a whole lot of extra time and cutting to get the boards to fit properly.
Let’s just say I went through more good planks than I’d like to admit trying to get the perfect cuts—definitely not cheap! And the process? Way longer than expected. My knees and back took a beating, even with knee pads and a back brace.
Moral of the story? A little prep work and research will save you time, money, and a whole lot of frustration!
Flooring Essentials: Let’s Get to the Basics!
The manufacturer really had my back with the measuring chart on the packaging! To figure out how much flooring I needed, I just multiplied the length by the width of my room. Then, I divided that number by the square footage listed on the box (something like 22.33 square feet). For example, my 12 x 10 room equals 120 square feet. Divide that by 22.33, and you get 5.37. Round up, and I needed 6 boxes. Who knew it was that simple? They even included step-by-step instructions with pictures! But let’s be real—nothing beats a good online video – someone talking you through the steps. I found video guides way more helpful when it came to actually seeing the process in action.
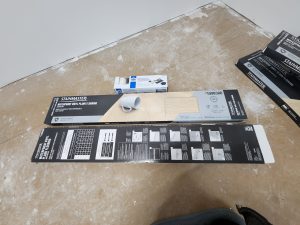
(Front and Back of Flooring Box)
I purchased my flooring from Lowe’s which wasn’t the cheapest route. If you or your spouse are a veteran, definitely take advantage of that military discount! Not signed up yet? Worth looking into.
Now, if you’re lucky enough to live near a Habitat for Humanity store, that’s where the real deals are! They sell boxes of flooring for as little as $25 a box—and if you can find enough to cover your space, you could cut your flooring costs in half! Now that’s a budget-friendly win.
The flooring was advertised as 100% waterproof and scratch-resistant—great for a space where things are constantly being moved around. At first, I thought, “How important can that really be?” Then I dropped a hammer on it. While the scratch resistance held up, let’s just say it still left its mark with a tiny dent. Lesson learned!
The installation uses a click-and-lock system, which sounds simple enough, right? I mean, how hard can click and lock really be? Well, turns out most of the boards slid into place without a fight, but some? Let’s just say they tested my patience. If one plank in the previous row wasn’t clicked together properly, you wouldn’t even realize it until you hit the next row and suddenly, nothing wanted to line up. So yeah—precision matters, and I learned that the hard way!
To tackle the job, I picked up a flooring cutter—pro tip: always double-check that the cutter you get is actually designed for the type of flooring you’re installing (trust me, it matters). The flooring cutter I purchased to help with the project made for quick cuts and really made a difference—especially when it came to trimming boards at the end of a row. It cut the planks like butter. While I haven’t used it since, it was definitely worth the investment at the time. I picked up the Brutus 12-inch Floor Cutter from Lowe’s for $160. If this splurge isn’t in your budget, you can use a utility knife to score and snap the planks.
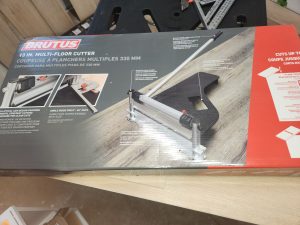
(Brutus Multi Floor Cutter)
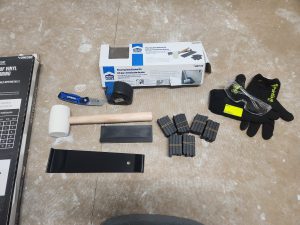
(Flooring Kit, Safety Glasses, Utility Knife, Measuring Tape, and Gloves)
Along with cutter, I grabbed a tool kit loaded with essentials: a rubber mallet, wedge spacers, a pull bar, and a tapping block. The tapping block was a lifesaver for getting a tight fit, while the mallet made sure everything locked into place. And when it came to those tricky, cramped spots, the pull bar stepped up to get those planks pulled together just right.
Additional tools to have on hand is an angle square and knee pads. Having the right tools made all the difference—without them, I probably would’ve been ready to call it quits halfway through!
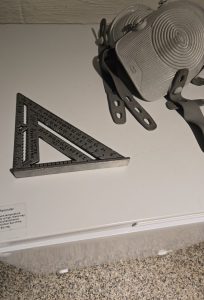
(Angle Square and Knee Pads)
Here’s a tip I picked up along the way: there’s definitely a method to the madness when it comes to installing the boards! While it might not be obvious at first glance, the planks have slight variations, and the trick is in how you lay them down. You’ll want to stagger the seams so they don’t line up—aim for at least 6 inches apart—and alternate the patterns as you go.
Oh, and don’t forget to mix planks from different boxes! This helps ensure you get a nice, uniform look once everything’s in place. It’s like putting together a puzzle, but with a touch of strategy to make it all come together seamlessly. Planning the layout was also a pain – listening to music helped keep the stress levels in check.

(Separated patterns into look alike groupings)
The spacers that came with the kit were a headache, they just wouldn’t stay put! I tried using tape like some people suggested, but nope, that was a fail. They kept falling over or wedging themselves between the wall and the flooring every time I had to adjust them, which was beyond frustrating.
Spacers are meant to keep the right amount of space—usually a ¼ inch expansion gap—between the planks and the wall, allowing the floor to do its thing and expand or contract over time. Fun fact: I had no idea floors even did that until I started researching! Did you? Because that was definitely news to me.
But knowing their purpose didn’t make them any less frustrating. Mine refused to cooperate, making the process more of a battle than a simple installation step!
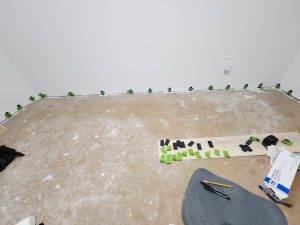
(Spacers that came with the install kit)
After a bit of Googling, I found plenty of people recommending T Floor Spaces for laminate flooring on Amazon.
![]()
(T Floor Spacers)
I gave those a try, and they worked much better. I probably went overboard and bought several boxes for my 12 x 10 space, but hey—it was my first flooring job!
As for the mallet, let’s just say I hammered the life out of the one that came with my kit. Rookie move! I ended up getting a more durable one off Amazon, along with a NAACOO Heavy Duty Tapping Block. Both made the job much easier, and the tapping block helped get those planks to fit snugly.
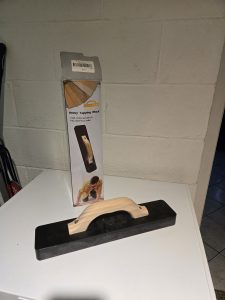
(Tapping Block)
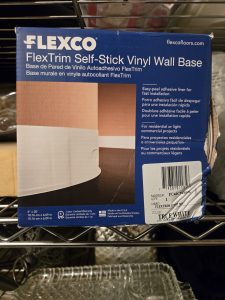
Wall Base (I used Flexco Self-stick True White Vinyl Wall Base (Rolled) $25 a roll (used 3) about 20 feet long)
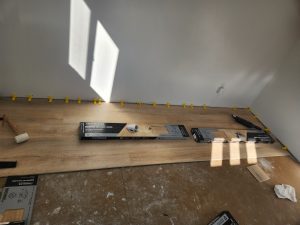
(Wall base unrolled to get an idea of how much I would need.)
To give my space that perfect finish from wall to floor, I went with PVC vinyl wall base—and let me tell you, installing it was a breeze compared to the flooring! I grabbed three boxes and unrolled as much as needed around the room before starting, which made things super manageable. It stuck nicely and blended seamlessly for a polished look.
When it came to sealing the seams and gaps between the wall and floor, I used DAP brand Alex Flex Premium Molding & Trim Sealant. Choose a color sealant that complements your baseboard color. In my case, I used white. I found the product easy to use, and while I didn’t always get it right (sometimes I went a little overboard), the good news is it cleans up easily with water (while it’s still wet).
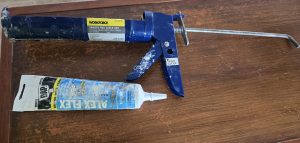
(Caulk Gun and Dap/Alex Flex Premium Molding & Trim Sealant – no caulk gun needed)
Any old caulk gun will do the trick, so no need to rush out and buy a new one. Just make sure it fits your caulk tube. But wait, let me tell you about the magical anti-drip caulk gun! Most caulk guns I’ve used keep oozing caulk even after you stop pulling the trigger, creating a sticky mess. The anti-drip caulk gun is a total game-changer—no more annoying drips when you let go of the trigger! Plus, mine came with a built-in spout cutter, so I didn’t even need a knife to poke a hole in the tube. All-in-one convenience! They also sell the sealant in a squeeze tub where you don’t need a caulk gun to use. These tools really made the finishing touches come together smoothly.
Cue the Drum Roll…From Bare to Beautiful!
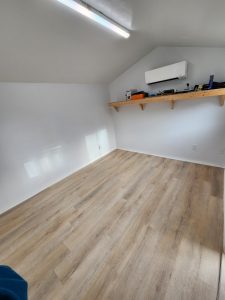
(Finished Floor)
I’m so proud of how my room turned out! I always believed I could pull it off, but I’d be lying if I said there weren’t moments where I felt like tossing a rug over the floor and calling it quits. Taking breaks and accepting that, as someone doing this alone with minimal experience, it was going to take time, trial, error, but the effort made all the difference.
Are there spots that reveal I’m not a pro? Sure, but they’re few and far between. My flooring has been in place for almost a year now, and I’m thrilled to say it’s holding up well and has weathered several seasons. If you’re someone with little experience but a lot of determination, I say go for it! Start small—maybe with a hallway, a closet, or a similarly manageable space. It’ll take some work, but the satisfaction you’ll feel when you look at what you accomplished will make it all worth it. You’ll be proud that you took matters into your own hands and Saved Yourself!